| Most viewed - Official Art |

z3-link-battles-gannon.jpgLink Battles Ganon6478 viewsSources: Image from the Official Link to the Past Nintendo Player's Guide. Scanned and Edited by Melora. The Illustrator was possibly Katsuya Terada. Notes: I had to think about where I wanted to place this image. Since it was from the LttP guide, but was illustrating back story for the original Legend of Zelda, I decided on this section. -Thought it would be fun to call him Gannon, like the original game text- silly me. Anyway, I love this picture of Link fighting Ganon, the silver arrow drawn for the final blow.Melora
|
|

z3-link-and-zelda.jpgLink and Zelda5389 viewsSources: Image from the Official Link to the Past Nintendo Player's Guide. Scanned and Edited by Melora. The Illustrator was possibly Katsuya Terada. Notes: I had to think about where I wanted to place this image. Since it was from the LttP guide, but was illustrating back story for the original Legend of Zelda, I decided on this section. I love this end-game imageMelora
|
|

z4-silver-arrow.jpgSilver Arrow5351 viewsSources: Image from the Official Link's Awakening Nintendo Player's Guide. Scanned and Edited by Melora. Notes: I had to think about where I wanted to place this image. Since it was from the LA guide, but was illustrating back story for the original Legend of Zelda, I decided on this section.Melora
|
|
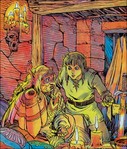
z3-link-and-impa.jpgLink and Impa3927 viewsSources: Image from the Official Link to the Past Nintendo Player's Guide. Scanned and Edited by Melora. The Illustrator was possibly Katsuya Terada. Notes: I had to think about where I wanted to place this image. Since it was from the LttP guide, but was illustrating back story for the original Legend of Zelda, I decided on this section.Melora
|
|
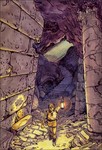
z3-link-in-dungeon.jpgDungeon Ruins3879 viewsSources: Image from the Official Link to the Past Nintendo Player's Guide. Scanned and Edited by Melora. The Illustrator was possibly Katsuya Terada. Notes: I had to think about where I wanted to place this image. Since it was from the LttP guide, but was illustrating back story for the original Legend of Zelda, I decided on this section. Great picture of Link in a labyrinth.Melora
|
|
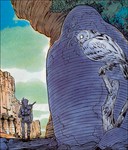
z3-link-ever-vigilant.jpgEver Vigilant3684 viewsSources: Image from the Official Link to the Past Nintendo Player's Guide. Scanned and Edited by Melora. The Illustrator was possibly Katsuya Terada. Notes: I had to think about where I wanted to place this image. Since it was from the LttP guide, but was illustrating back story for the original Legend of Zelda, I decided on this section. After defeating evil, Link remains ever vigilant.Melora
|
|
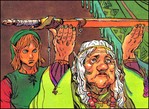
z4-impa.jpgImpa3585 viewsSources: Image from the Official Link's Awakening Nintendo Player's Guide. Scanned and Edited by Melora. Notes: I had to think about where I wanted to place this image. Since it was from the LA guide, but was illustrating back story for the original Legend of Zelda, I decided on this section.Melora
|
|
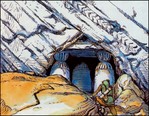
z3-link-dungeon-entrance.jpgLink at the Dungeons Entrance3474 viewsSources: Image from the Official Link to the Past Nintendo Player's Guide. Scanned and Edited by Melora. The Illustrator was possibly Katsuya Terada. Notes: I had to think about where I wanted to place this image. Since it was from the LttP guide, but was illustrating back story for the original Legend of Zelda, I decided on this section. -Link going to one of the mountain top dungeonsMelora
|
|

z3-link-and-monster.jpgDesert Hazards2962 viewsSources: Image from the Official Link to the Past Nintendo Player's Guide. Scanned and Edited by Melora. The Illustrator was possibly Katsuya Terada. Notes: I had to think about where I wanted to place this image. Since it was from the LttP guide, but was illustrating back story for the original Legend of Zelda, I decided on this section.Melora
|
|
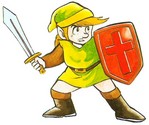
Link.jpg2550 viewsLink.
|
|

ganondefeated2.jpg2482 viewsBetter version of above image.
|
|
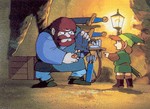
merchant2.jpg2445 viewsBetter version of above image.
|
|
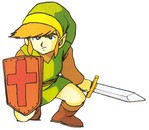
linkcrouched.jpg2368 viewsLink crouched, with sword and shield ready (from included map).
|
|

fairy2.jpg2363 viewsBetter version of above image.
|
|

overworld.gif2353 viewsThe Overworld of Hyrule, from the manual with the storyline text removed.
|
|

trapped2.jpg2254 viewsBetter version of above image.
|
|

deathmountain3.jpg2205 viewsBetter version of above image.
|
|

link.jpg2181 viewsLink holding sword and shield.
|
|

linksearching2.jpg2165 viewsBetter version of above image.
|
|

dungeon3.jpg2130 viewsBetter version of above image.
|
|
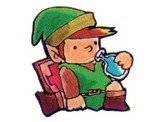
linkpotion.jpg2098 viewsLink drinking some blue potion.
|
|
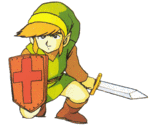
linkcrouched.gif2088 viewsAbove, with transparent background.
|
|

impa2.jpg2085 viewsBetter version of above image.
|
|

link1.jpg2006 viewsDifferent version of above image.
|
|
| 241 files on 11 page(s) |
 |
1 |  |
 |
 |
 |
 |
 |
 |
 |
 |
 |
|